Setup Organization Settings
Discover how to configure organization details, manage resources, and add bank info, categories, and features for your properties.

Durga B
Last Update 2 months ago
1. Start by navigating to the 'Manage' section from sidebar

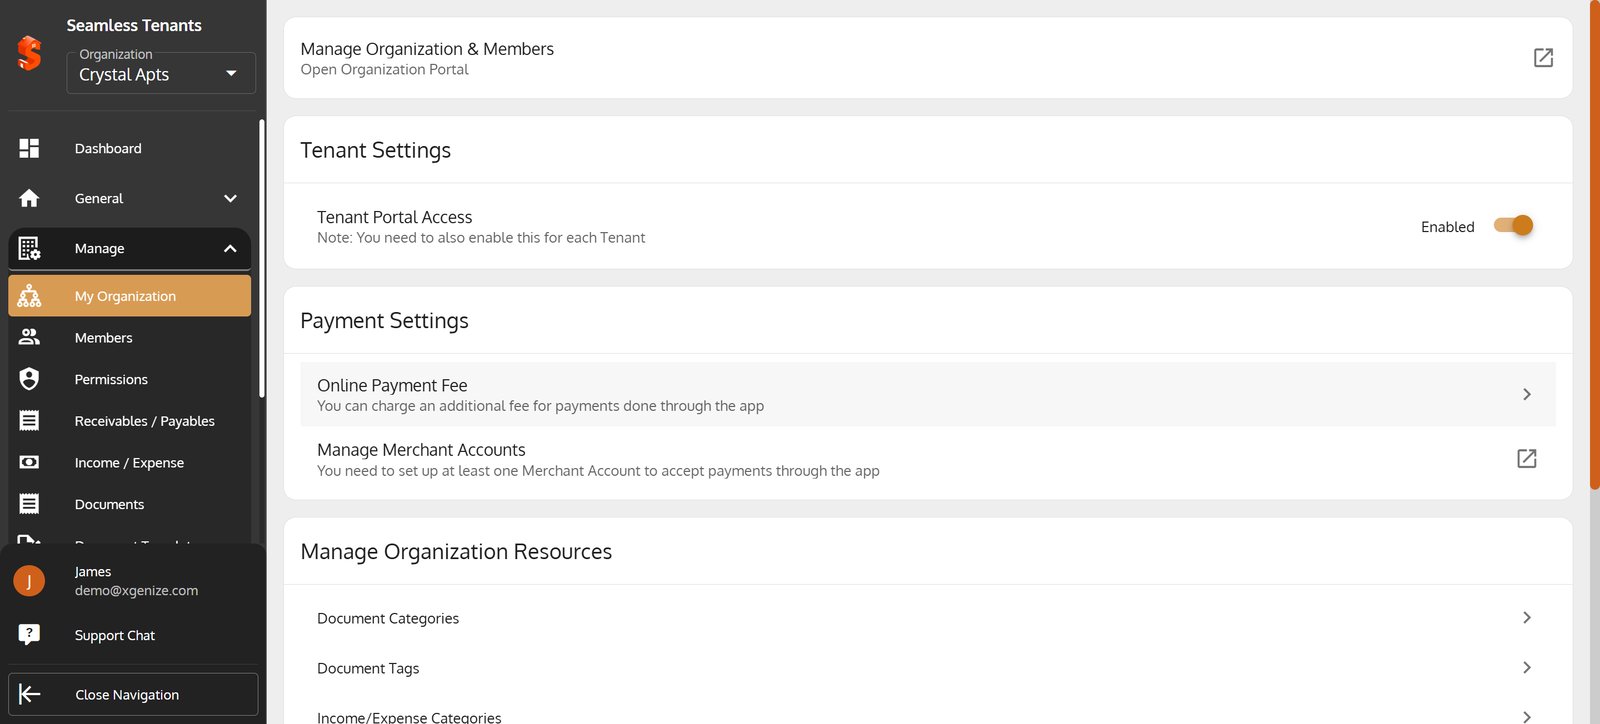
2. Select 'My Organization' to access your organization's management and settings dashboard.

3. Click the link to access 'Organization Portal' to Manage Members
Click the link to access 'Organization Portal' to Manage Members

4. Toggle Tenant Portal Access to empower tenants with online self-service options.
Toggle Tenant Portal Access to empower tenants with online self-service options.

5. Adjust your Online Payment Fee here to optimize payment convenience for both you and tenants.
Adjust your Online Payment Fee here to optimize payment convenience for both you and tenants.

6. Enter your preferred online payment fee percentage.

7. Click SAVE to apply your updated fee settings instantly.

8. Manage Merchant Accounts to access portal and organize your accounts.
Manage Merchant Accounts to access portal and organize your accounts.

9. Manage Document Categories to organize important paperwork for easy retrieval.
Manage Document Categories to organize important paperwork for easy retrieval.

10. Select + Add Document Category to create a new, custom document type for your organization.
Select + Add Document Category to create a new, custom document type for your organization.

11. Press SAVE to add your new document category and streamline document management.
Press SAVE to add your new document category and streamline document management.

12. Return to My Organization for a consolidated view of your settings and updates.
Return to My Organization for a consolidated view of your settings and updates.

13. Click Document Tags to define and manage the labels used across your tenant documents.
Click Document Tags to define and manage the labels used across your tenant documents.

14. Use + ADD DOCUMENT TAG to further organize and label your documents for quick access.
Use + ADD DOCUMENT TAG to further organize and label your documents for quick access.

15. Click SAVE to keep your document tags updated and your files easy to search.
Click SAVE to keep your document tags updated and your files easy to search.

16. Navigate with My Organization breadcrumbs for seamless access to all core settings.
Navigate with My Organization breadcrumbs for seamless access to all core settings.

17. Manage Income/Expense Categories to stay on top of organizational finances.
Manage Income/Expense Categories to stay on top of organizational finances.

18. Click ADD to introduce a new income category tailored to your business needs.
Click ADD to introduce a new income category tailored to your business needs.

19. Save your new income category for more organized financial tracking.
Save your new income category for more organized financial tracking.

20. Select ADD in Expense Categories to define new expenditures relevant to your operations.
Select ADD in Expense Categories to define new expenditures relevant to your operations.

21.Press SAVE to finalize and categorize your expense for better accounting.

22.
23. Click My Organization to configure your property management organization settings.
Click My Organization to configure your property management organization settings.

24. Go to Bank Information to update your organization's payment credentials securely.
Go to Bank Information to update your organization's payment credentials securely.

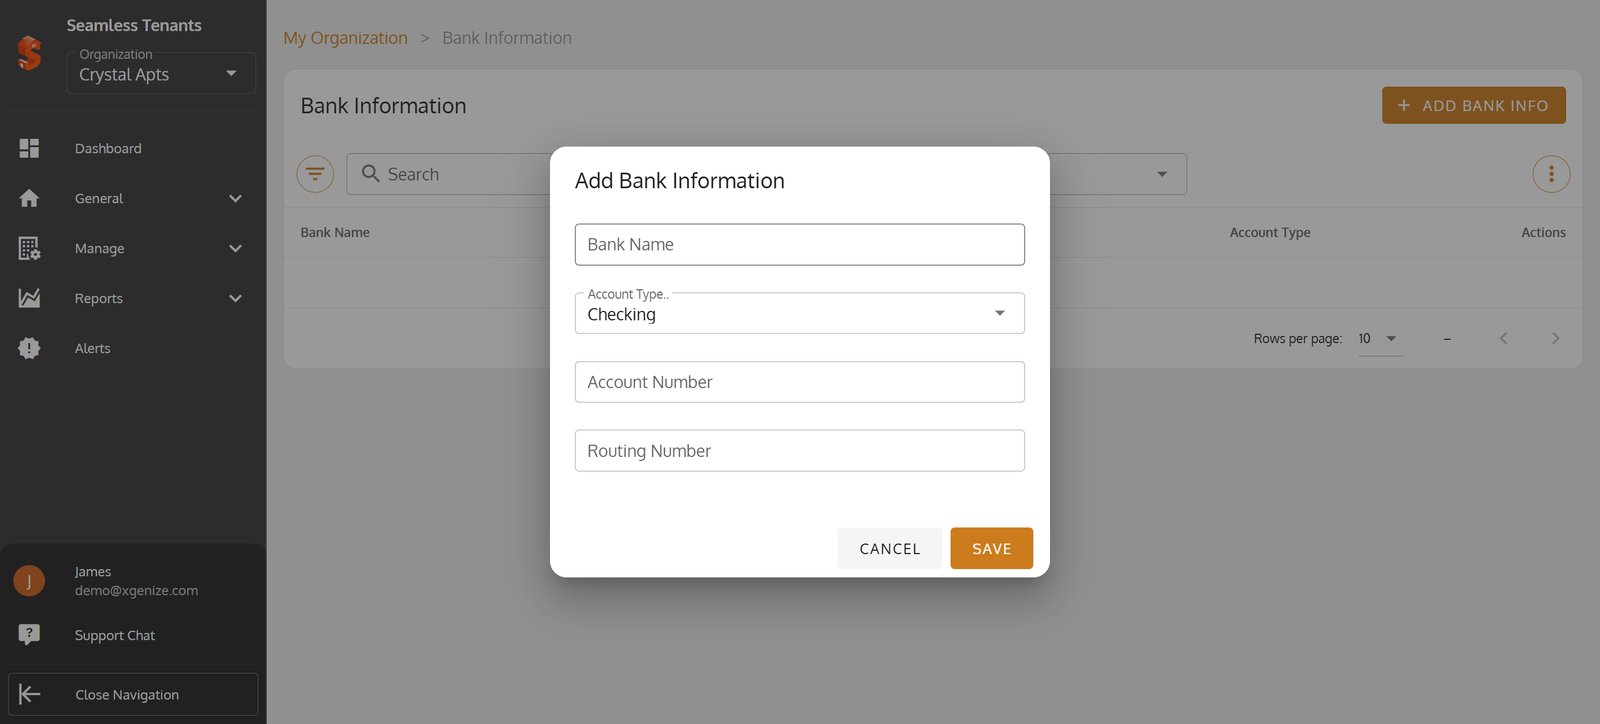
25. Click Add Bank Info to securely link your organization's financial accounts.
Click Add Bank Info to securely link your organization's financial accounts.

26.
27.
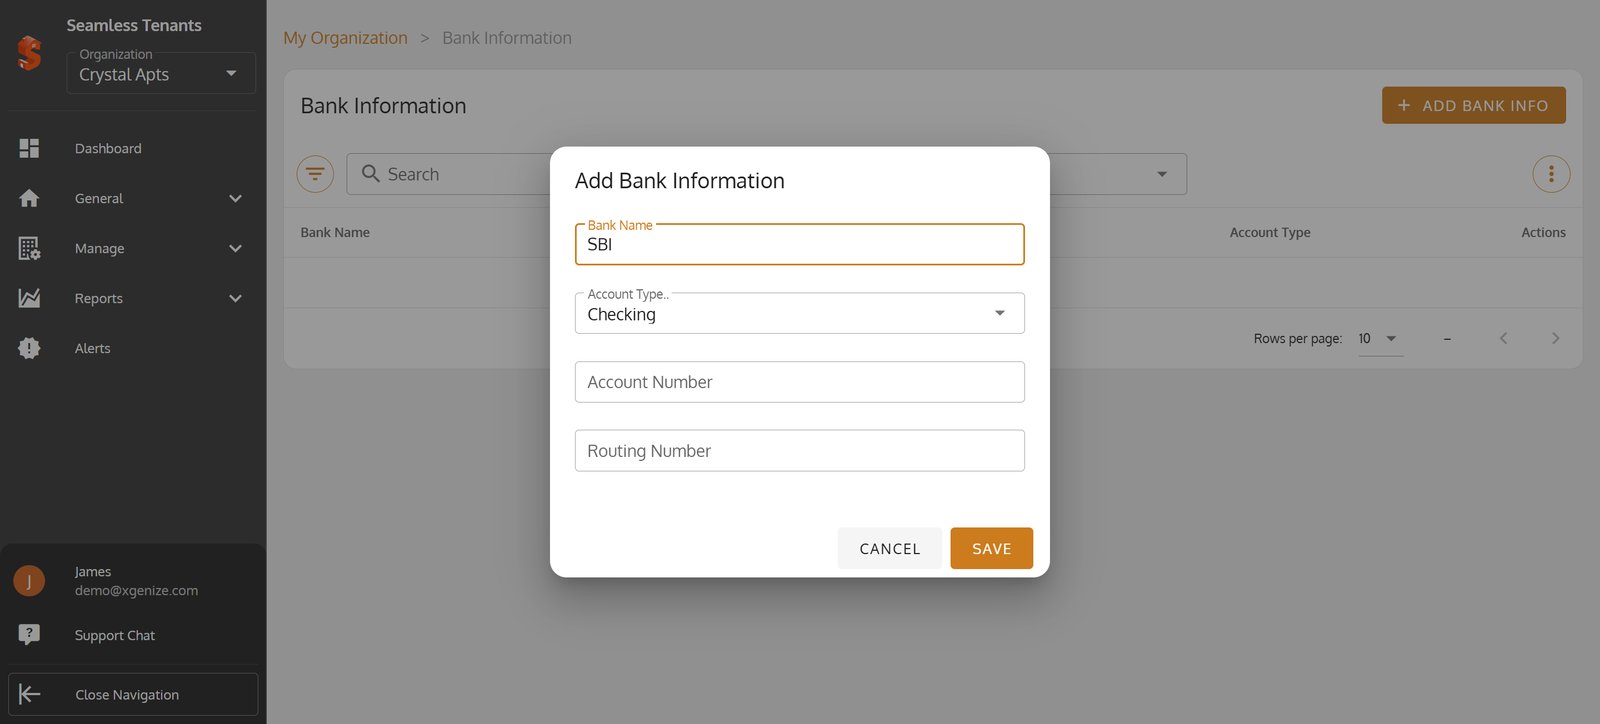
28. Hit SAVE to securely store your new bank details and support easy payments.
Hit SAVE to securely store your new bank details and support easy payments.

29. Click My Organization to go back again.
Click My Organization to go back again.

30. Select Amenities to configure the features available to your tenants.
Select Amenities to configure the features available to your tenants.

31. Add a New Amenity to enhance property appeal and attract tenants.
Add a New Amenity to enhance property appeal and attract tenants.

32. SAVE your new amenity entry to immediately update what's available to your residents.
SAVE your new amenity entry to immediately update what's available to your residents.

33. Return to My Organization for a holistic view of your amenities and resources.
Return to My Organization for a holistic view of your amenities and resources.

34. Select Features to manage unique selling points for your properties.
Select Features to manage unique selling points for your properties.

35. Choose Add Feature to highlight new or desirable property features.
Choose Add Feature to highlight new or desirable property features.

36. SAVE to confirm and publish your newest property feature instantly.
SAVE to confirm and publish your newest property feature instantly.

37. Use My Organization at the top for quick access to go back.
Use My Organization at the top for quick access to go back.

38. Select Location Tags to group properties by location, making search and organization easier.
Select Location Tags to group properties by location, making search and organization easier.

39. Click + Add Location Tag to introduce new geographical tags tailored to your portfolio.
Click + Add Location Tag to introduce new geographical tags tailored to your portfolio.

40. Hit SAVE to quickly add your new location tag for improved property categorization.
Hit SAVE to quickly add your new location tag for improved property categorization.

41. Navigate back to My Organization for a master view of your customized settings.
Navigate back to My Organization for a master view of your customized settings.

42.